As Fullstack developers, we often crave the strict structure we find in backend frameworks like Spring Boot. In the frontend world, however, visual hierarchy often dictates architecture. We’ve all been there: a project starts clean, but six months later, you’re staring at a shared folder containing 50 unrelated components, a components directory that mixes dumb UI elements with heavy business logic, and stylesheets that are impossible to refactor without breaking half the application.
My search for a better way to structure Angular applications led me back to high school chemistry class - or rather, to Atomic Design.
Atomic Design is a methodology coined by Brad Frost that invites us to view our user interface not as a collection of pages, but as a hierarchical system of components. It bridges the gap between the “part” and the “whole,” allowing us to focus on a single input field (the atom) while simultaneously understanding how it serves the final login screen (the page).
In this article, we will explore how to apply Atomic Design to an Angular application using a practical “Login” scenario.
The Periodic Table of Angular Components
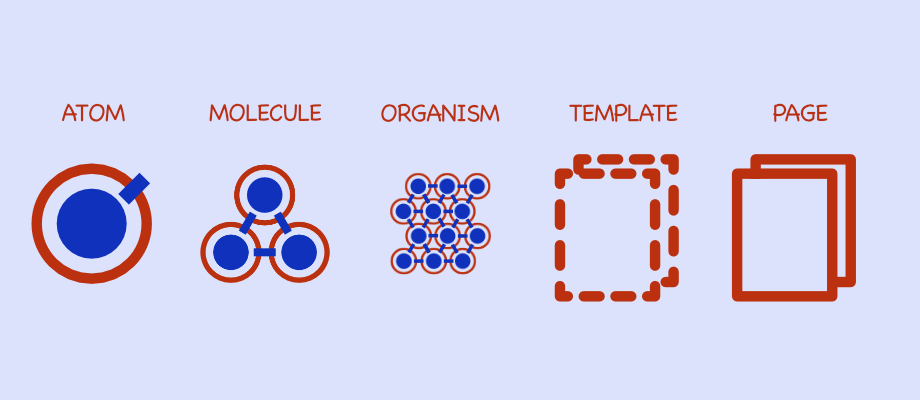
In the natural world, atomic elements combine to form molecules, which combine further to form complex organisms. Our interfaces are no different. Frost breaks the UI down into five distinct levels:
- Atoms
- Molecules
- Organisms
- Templates
- Pages
Let’s break these down using a classic Login feature to see how they translate to modern Angular code (v19+).
1. Atoms: The Primitives
In chemistry, an atom is the basic building block of matter. A hydrogen atom has distinct properties, but it doesn’t “do” much on its own.
In Angular, Atoms are your foundational, “dumb” presentation components.
They contain no business logic, no dependency injections, and purely rely on
input() for configuration and output() for events.
The Login Scenario:
For our login screen, an Atom isn’t the login form itself. It is the
UiInputAtom, the UiButtonAtom, or the UiLabelAtom. Crucially, input atoms often
implement ControlValueAccessor, allowing them to plug seamlessly into Angular
Forms.
@Component({
  selector: "app-ui-button-atom",
  template: `
    <button
      [disabled]="disabled()"
      (click)="clicked.emit($event)"
      class="base-btn {{ variant() }}"
    >
      <ng-content />
    </button>
  `,
})
export class UiButtonAtom {
  // Modern signal-based inputs
  disabled = input(false);
  variant = input<"primary" | "secondary">("primary");
  clicked = output<MouseEvent>();
}
This component knows nothing about “Logging in”. It only knows how to be a button.
2. Molecules: Doing One Thing Well
In nature, when two hydrogen atoms bond with an oxygen atom, they form water. The molecule has totally different properties than the atoms that comprise it.
In Angular, Molecules are groups of atoms bonded together to function as a unit. They adhere to the Single Responsibility Principle. This is where you might introduce UI-specific logic (like toggling a password visibility), but never backend calls.
The Login Scenario:
A raw input field is rarely used alone. A Molecule in our scenario would be
the PasswordFieldMolecule.
It combines:
- A UiLabelAtom (“Password”)
- A UiInputAtom (type=“password”)
- A generic UiErrorAtom (for validation messages)
By grouping these abstract atoms, they suddenly have purpose. The label defines the input; the error validates it. The result is a portable component you can drop anywhere a password is required.
3. Organisms: The Functional Unit
Organisms are groups of molecules and atoms joined together to form a distinct section of an interface. This is usually the first level where we see “Smart” components handling specific business contexts.
The Login Scenario:
Our organism is the LoginFormOrganism. It combines:
- An EmailFieldMolecule
- A PasswordFieldMolecule
- A LoginActionsMolecule (Submit button + “Forgot Password” link)
The Organism is responsible for the FormGroup (using Typed Reactive Forms). It captures the user’s intent. While it manages the validity of the form, it usually stops short of making the HTTP request. Instead, it emits a strongly typed loginPayload event.
@Component({
  selector: "app-login-form-organism",
  imports: [EmailFieldMolecule, PasswordFieldMolecule, ReactiveFormsModule],
  template: `
    <form [formGroup]="loginForm" (ngSubmit)="onSubmit()">
      <app-email-field-molecule [control]="loginForm.controls.email" />
      <app-password-field-molecule [control]="loginForm.controls.password" />
      @if (loginError()) {
        <app-ui-alert-atom type="error">Invalid credentials</app-ui-alert-atom>
      }
      <app-ui-button-atom type="submit">Log In</app-ui-button-atom>
    </form>
  `,
})
export class LoginFormOrganism {
  login = output<LoginCredentials>();
  loginError = input<string | null>(null);
  // ... Form logic setup
}
4. Templates: The Skeleton
It helps to break the chemistry analogy here. Templates are page-level objects that place components into a layout.
The Login Scenario:
We might have an AuthLayoutTemplate. This component defines the skeleton: a logo
on the left, a centered card for content on the right, and a footer at the
bottom. It uses generic slots (Content Projection via ng-content or
router-outlet) to hold the actual organisms. It provides the guardrails for the
design system.
5. Pages: The “Meat” on the Bones
Pages are specific instances of templates. This is the concrete stage where real content meets the structure. This is the entry point of your Angular Route.
The Login Scenario:
The LoginPageComponent is what your router points to.
- It injects the AuthService.
- It uses the AuthLayoutTemplate.
- It places the LoginFormOrganism inside the layout.
- It listens to the (login) event from the organism and triggers the actual HTTP call.
By isolating the logic here, you can test the Page for integration and the Organism for form logic independently.
Modern Angular: Signals, Standalone & Control Flow
With Angular versions 19+ implementation becomes much cleaner:
- Standalone Components: We no longer need a massive SharedModule where all
Atoms live. An Organism simply imports the specific Molecules it needs
imports: [ UiButtonAtom ]. This makes dependency graphs transparent and tree-shaking effective. - New Control Flow: The
@ifand@forsyntax reduces the visual noise in your templates, making Molecules and Organisms easier to read compared to the old*ngIf. - Signals: State management at the Atom level becomes trivial. Change detection performance improves because an update to a specific Atom’s signal doesn’t necessarily need to re-check the entire Organism tree.
Common Pitfalls
Even with a solid methodology, it is easy to veer off course. Here are five common mistakes to watch out for:
-
The Monolithic Folder Trap: Dumping all components into a single shared folder flattens your hierarchy and makes component discovery nearly impossible. Instead, use explicit directories (/atoms, /molecules).
-
Naming Ambiguity: Avoid context-specific names like LoginInputComponent for lower-level components, as this creates confusion and discourages reuse in other features. Name them based on their function (e.g., UiInputAtom).
-
Mixing Business Logic: Never inject services or business logic directly into Atoms or Molecules - doing so destroys their purity and reusability across the application. Keep these layers “dumb” by relying strictly on
input()for data andoutput()for communication. -
Skipping Levels: A Molecule should never contain an Organism, as this inverts the complexity hierarchy and creates a tangled dependency graph. Respect the strict direction of flow: Page → Template → Organism → Molecule → Atom.
-
The “Copy-Paste” Syndrome: Don’t copy-paste an entire LoginFormOrganism just to create a similar registration form. Instead, extract the common parts into shared Molecules (like UserCredentialsMolecule) and simply compose them differently for the new use case.
Scaling Up: The Role of Nx
If you are working in a large team or a monorepo environment, strictly following Atomic Design relies heavily on discipline. However, discipline scales poorly. This is where Nx is a game-changer. Nx allows you to enforce Atomic Design boundaries physically through library types and tagging. Instead of just folders, you create lightweight libraries.
Imagine an Nx workspace structure like this:
- libs/ui/atoms (Tag: type:atom)
- libs/ui/molecules (Tag: type:molecule)
- libs/features/auth (Tag: type:feature)
Using ESLint rules provided by Nx (@nx/enforce-module-boundaries), you can configure the system similarly to how you might use ArchUnit in Spring Boot: defining rigid architectural rules that break the build if violated. You can ensure that:
- Atoms cannot import anything.
- Molecules can only import Atoms.
- Organisms can import Molecules and Atoms.
- Features (Pages) can import Organisms.
If a developer tries to import the AuthService into a UiButtonAtom, the build will fail. This turns Atomic Design from a “nice idea” into a rigid, automated architectural rule.
Conclusion
Atomic Design offers a shared language for developers and designers. It helps us avoid the “monolithic component” trap by forcing us to think about composition. By decoupling the “Login Button” from the “Login Logic,” we create a codebase that is easier to test, easier to maintain, and ready for whatever future version of Angular comes next.